DSR ProSeries Battery Charger Manual: A Comprehensive Guide
This manual details the DSR ProSeries chargers, supporting Standard, AGM, Gel, Deep-Cycle, and Lithium-Ion batteries.
Input is 120V AC, with outputs ranging from 6V to 12V.
Welcome to the DSR ProSeries Battery Charger – a robust and versatile solution for all your battery charging needs. This charger series is engineered to efficiently and safely charge a wide array of battery types, including Standard, AGM, Gel, Deep-Cycle, and advanced Lithium-Ion batteries.
The DSR ProSeries offers both manual and automatic charging modes, providing users with complete control and convenience.
Available in both 4-bank (DSR125) and 8-bank (DSR127) configurations, these chargers are ideal for various applications. They accept a 120V AC input and deliver outputs ranging from 6V to 12V, with continuous current outputs up to 10 Amps. This manual provides comprehensive instructions for safe operation, maintenance, and troubleshooting.

Understanding Battery Types Supported
The DSR ProSeries charger is designed to accommodate a diverse range of battery chemistries, ensuring optimal charging for each type. This includes traditional Standard batteries, AGM (Absorbent Glass Mat) batteries known for their spill-proof design, and sealed Gel batteries.
Furthermore, the charger effectively manages Deep-Cycle batteries, commonly used in marine and RV applications, and modern Lithium-Ion batteries, offering precise charging profiles for extended lifespan and performance. Proper battery type selection within the charger’s settings is crucial for safe and efficient charging, preventing damage and maximizing battery capacity.
Standard Batteries
Standard, or flooded, lead-acid batteries are the most traditional and cost-effective option. The DSR ProSeries charger provides a reliable charging solution for these batteries, utilizing a controlled current and voltage approach.
It’s important to note that standard batteries require periodic maintenance, including checking and refilling electrolyte levels with distilled water. The charger’s settings should be configured to match the battery’s voltage and capacity for optimal results. Ensure proper ventilation during charging, as these batteries release hydrogen gas.
AGM (Absorbent Glass Mat) Batteries
AGM batteries are sealed, valve-regulated lead-acid batteries known for their maintenance-free operation and spill-proof design. The DSR ProSeries charger features a dedicated AGM charging profile, delivering a precise charging algorithm tailored to these batteries’ unique characteristics.
This profile optimizes charging efficiency and extends battery lifespan. Unlike standard batteries, AGM batteries do not require periodic water replenishment. The charger automatically adjusts voltage and current to prevent overcharging and sulfation. Proper selection of the AGM charging mode is crucial for maximizing performance and longevity.

Gel Batteries
Gel batteries, another type of sealed lead-acid battery, utilize a gelled electrolyte, making them exceptionally robust and vibration-resistant. The DSR ProSeries charger incorporates a specialized charging profile specifically designed for Gel batteries, ensuring safe and effective charging.
This profile employs a lower charging voltage compared to other battery types, preventing gel damage and gassing. Overcharging Gel batteries can lead to irreversible capacity loss. The charger’s intelligent algorithm monitors battery voltage and adjusts the charging process accordingly. Selecting the correct Gel battery mode is vital for optimal performance and extended battery life.
Deep-Cycle Batteries
Deep-cycle batteries are engineered to withstand repeated discharge and recharge cycles, making them ideal for applications demanding sustained power delivery. The DSR ProSeries charger features a dedicated Deep-Cycle charging mode optimized for these robust power sources.
This mode utilizes a multi-stage charging process, including equalization, absorption, and float stages, to fully replenish the battery and prevent sulfation. Sulfation, the buildup of lead sulfate crystals, reduces battery capacity. The charger’s intelligent control system ensures a complete and balanced charge, maximizing the lifespan of your deep-cycle batteries.
Lithium-Ion Batteries
The DSR ProSeries charger safely and efficiently charges Lithium-Ion batteries, a popular choice for their high energy density and lightweight design. This requires a specialized charging profile, and our charger delivers precisely that.
Unlike traditional lead-acid batteries, Lithium-Ion batteries demand a constant-current/constant-voltage (CC/CV) charging process. The DSR ProSeries charger automatically detects the battery type and adjusts its charging parameters accordingly, preventing overcharge and ensuring optimal performance. Proper charging is crucial for Lithium-Ion longevity and safety.
Technical Specifications of DSR ProSeries Chargers
DSR ProSeries chargers are engineered for reliable performance and versatility. Input voltage operates at 120V AC, with a maximum input current of 12.5 Amps for the DSR127 model and 12 Amps for the DSR125.
Output capabilities include both 6V and 12V options. The DSR127 provides a continuous output current of 7 Amps at 12V, with a peak of 4 Amps at 6V and 12 Amps at 12V. The DSR125 delivers 10 Amps continuous at 12V. These specifications ensure compatibility with a wide range of battery sizes and types.
Input Voltage and Current
The DSR ProSeries chargers are designed to operate efficiently with standard North American power supplies. They accept a standard input voltage of 120V AC, ensuring broad compatibility within residential and commercial settings.
Regarding current draw, the DSR127 8-Bank Charging Station has a maximum input current requirement of 12 Amps. The DSR125 4-Bank Charging Station requires a maximum input current of 12.5 Amps. It’s crucial to ensure the power circuit can adequately supply this current to prevent tripping breakers or damaging the charger.
Output Voltage and Current
The DSR ProSeries chargers offer versatile output options to accommodate a wide range of battery types and sizes. Both models, the DSR127 and DSR125, provide selectable output voltages of both 6V and 12V, allowing for charging of various battery systems;
The DSR127 8-Bank Charging Station delivers a continuous output current of 7 Amps at 12V, with a peak intermittent current of 4 Amps. The DSR125 4-Bank Charging Station provides a continuous output current of 10 Amps at 12V. These outputs are designed for efficient and safe battery charging.
DSR127 8-Bank Charging Station: Features and Usage
The DSR127 is a robust 8-bank charging station designed for simultaneous charging of up to eight batteries. It accepts a 120V AC input with a maximum current draw of 12 Amps. This charger supports Standard, AGM, Gel, Deep-Cycle, and Lithium-Ion battery types, offering broad compatibility.
Each bank operates independently, providing a continuous 12V output of 7 Amps. It’s ideal for applications requiring multiple battery maintenance, like golf carts or fleet management. A downloadable product manual (PDF) provides detailed instructions for safe and effective operation.
DSR125 4-Bank Charging Station: Features and Usage
The DSR125 is a versatile 4-bank charging station, capable of charging four batteries concurrently. It operates on a 120V AC input, with a maximum current of 12.5 Amps. Like the DSR127, it’s compatible with Standard, AGM, Gel, Deep-Cycle, and Lithium-Ion batteries, offering flexible charging solutions.
Each bank delivers a continuous 10 Amp output at 6V/12V, suitable for a range of battery sizes. This station is perfect for smaller-scale battery maintenance needs. A comprehensive product manual is available for download in PDF format, detailing setup, operation, and safety guidelines.
Charging Modes and Selection
DSR ProSeries chargers offer both Manual and Automatic charging modes, providing users with control and convenience. Manual mode allows for customized voltage and current settings, ideal for specific battery requirements or testing. Automatic mode intelligently manages the charging cycle, optimizing for battery type and condition.

Selecting the appropriate mode is crucial for optimal performance and battery longevity. The charger automatically detects battery type, but manual override is available. Understanding these modes ensures efficient and safe charging, maximizing the lifespan of your batteries and preventing overcharging issues.
Manual Mode Operation
In Manual Mode, the user directly controls the charging parameters – voltage and current. This mode is best suited for experienced users who understand their battery’s specific needs. Carefully adjust the voltage to match the battery’s requirements, avoiding overvoltage which can cause damage.
Monitor the current closely during charging; excessive current can lead to overheating. The DSR ProSeries charger displays real-time voltage and current readings for precise control. Remember to disconnect the battery promptly once charging is complete to prevent overcharging and potential hazards. Always prioritize safety when using Manual Mode.
Automatic Charging Cycle Explained
The DSR ProSeries charger’s automatic cycle optimizes battery life and performance. It begins with a qualification phase, assessing the battery’s voltage and condition. Next, a bulk charge rapidly restores most of the battery’s capacity. Following this, an absorption phase fine-tunes the charge, maintaining constant voltage while current decreases.
Finally, a float phase maintains the battery at full charge with a reduced voltage. This prevents sulfation and extends lifespan. The charger automatically transitions between these phases, ensuring efficient and safe charging without manual intervention. This intelligent cycle adapts to different battery types.
Troubleshooting Common Issues
If the charger fails to power on, verify the AC input and check the fuse. For a battery not charging, ensure proper connections and select the correct battery type. Inspect the battery terminals for corrosion, cleaning them if necessary. Error codes indicate specific problems; consult the manual’s code list for detailed explanations.
Common errors relate to reversed polarity or a faulty battery. If issues persist, disconnect the charger and battery, then reconnect carefully. Always prioritize safety and avoid attempting repairs beyond basic checks. Contact customer support for complex problems.
Charger Not Powering On
If the DSR ProSeries charger doesn’t power on, first confirm the AC power cord is securely connected to both the charger and a working outlet. Check the outlet’s functionality with another device. Next, inspect the charger’s internal fuse – a blown fuse is a common cause. Ensure the input voltage matches your power supply (120V AC).
If the fuse is intact and the outlet works, there may be an internal charger fault. Do not attempt to disassemble the unit yourself; contact qualified service personnel for assistance. Always disconnect the charger from power before inspecting any components.
Battery Not Charging
If a battery isn’t charging with your DSR ProSeries charger, verify the battery connections are clean and secure. Corrosion or loose connections can prevent proper charging. Confirm the battery voltage is within the charger’s supported range (6V/12V). Ensure the correct charging mode is selected for the battery type – Standard, AGM, Gel, Deep-Cycle, or Lithium-Ion.
A severely discharged battery may take time to register a charge. If the issue persists, test the battery with a multimeter to assess its health. A failing battery may not accept a charge.
Error Codes and Their Meanings
The DSR ProSeries charger utilizes error codes to indicate specific issues. While a comprehensive list is in the full PDF manual, common codes include “E1” signifying a reversed polarity connection – immediately disconnect and correct. “E2” indicates an over-voltage situation, potentially due to unstable input power; check your power source.
“E3” suggests a short circuit, requiring disconnection and inspection of the battery and cables. “E4” often points to a faulty battery cell. Refer to the complete manual (available for PDF download) for a detailed explanation of all error codes and recommended troubleshooting steps.
Safety Precautions
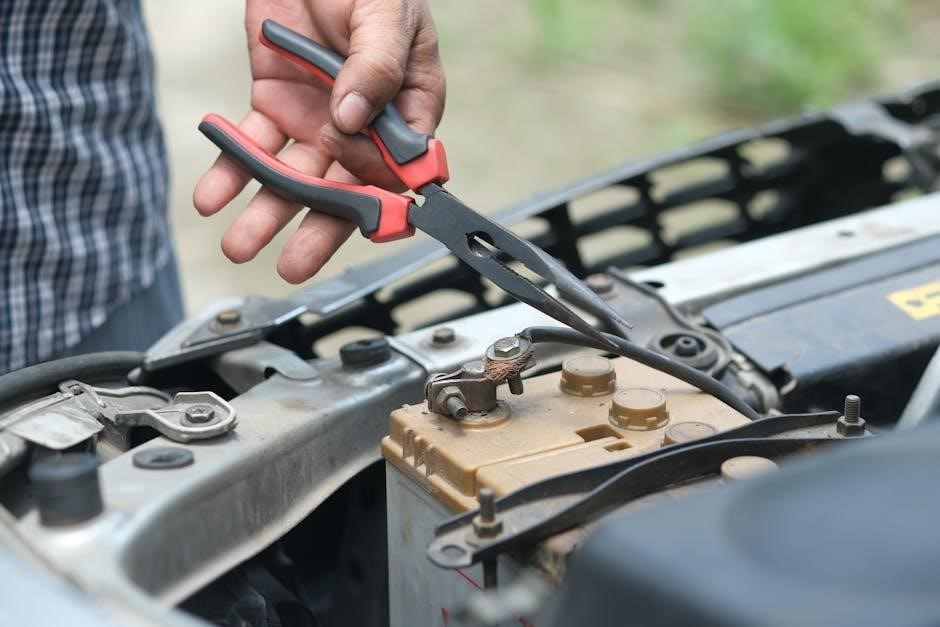
Always prioritize safety when operating the DSR ProSeries charger. Ensure the charger is used in a well-ventilated area, free from flammable materials. Never charge damaged batteries, as they may explode or leak corrosive materials. Disconnect the charger from the power source before making any connections or disconnections to the battery.
Avoid contact with battery acid; wear appropriate protective gear like gloves and eye protection. Do not attempt to disassemble the charger. Refer to the full product manual (PDF download available) for complete safety guidelines and warnings to prevent injury or equipment damage.
Maintenance and Care
To ensure the longevity of your DSR ProSeries charger, regular maintenance is recommended. Periodically inspect the AC power cord and DC output cables for any signs of damage, replacing them if necessary. Keep the charger clean and dry, wiping down the exterior with a damp cloth. Avoid using harsh chemicals or solvents.
Ensure proper ventilation around the unit to prevent overheating. Refer to the downloadable product manual (PDF) for detailed cleaning instructions and troubleshooting tips. Proper care will maximize performance and extend the life of your DSR ProSeries battery charger.

DSR vs. DLDSR: A Comparison (Related to Resolution Scaling)
DSR (Dynamic Super Resolution) renders at a higher resolution and downscales, improving image quality but demanding more performance. DLDSR (Deep Learning Dynamic Super Resolution) utilizes AI to upscale, offering similar benefits with potentially less performance impact. 4x DSR with 0 smoothness is often considered the optimal setting for visual fidelity.
2.25x DLDSR provides a good balance between quality and performance. Older DSR versions exhibited jaggies at lower scaling factors, a problem largely resolved by DLDSR. Choosing between them depends on your GPU and desired visual experience.
Optimizing DSR/DLDSR Settings for Performance
Resolution scaling factors significantly impact performance. 1.78x and 2.25x offer a compromise between visual fidelity and frame rates, while 4x provides the highest quality but is most demanding. Smoothness settings affect image clarity; lower values (like 0) generally yield sharper images but can introduce artifacts.
Experimentation is key. If performance suffers, reduce the scaling factor or increase smoothness. DLDSR at 2.25x/33 is often a sweet spot for many GPUs. Consider your hardware and target resolution when making adjustments.

Resolution Scaling Factors (1.78x, 2.25x, 4x)
DSR offers several scaling factors, each impacting image quality and performance. 1.78x provides a subtle enhancement, requiring minimal performance overhead. 2.25x strikes a balance, offering noticeable improvements without excessive strain. 4x DSR delivers the most significant visual upgrade, effectively rendering at four times the native resolution.

Higher scaling factors demand more GPU power. 4x is best suited for powerful hardware, while 1.78x or 2.25x may be preferable for less capable systems. DLDSR offers similar options with potentially improved performance.
Smoothness Settings and Their Impact
DSR’s smoothness setting controls the level of antialiasing applied after upscaling. A value of 0 provides the sharpest image but can introduce shimmering or crawling artifacts, particularly on fine details. Higher smoothness values (up to 33 or more) reduce these artifacts but soften the overall image.
Finding the optimal balance depends on personal preference and the game being played. 0 smoothness with 4x DSR is often recommended for maximum clarity if your system can handle it. DLDSR benefits from smoothness settings, with 2.25x/33 being a popular choice.
Performance Considerations with DSR/DLDSR
Enabling DSR or DLDSR inherently introduces a performance cost, as the game is rendered at a higher resolution before being downscaled to your display’s native resolution. Rendering at the display resolution directly will always yield better performance. The impact varies based on your GPU, the chosen scaling factor, and the game itself.
4x DSR is the most demanding, while DLDSR at 2.25x/33 offers a good balance between visual quality and performance. Lower scaling factors (1.78x) reduce the performance hit but also diminish the visual benefits. Monitor your frame rates and adjust settings accordingly.
Downloading the Product Manual (PDF)
Accessing the complete DSR ProSeries Battery Charger Manual in PDF format is straightforward. Detailed instructions, safety guidelines, and troubleshooting steps are readily available for download. For the DSR127 8-Bank Charging Station manual, please visit [link to DSR127 PDF ౼ placeholder].
Similarly, the DSR125 4-Bank Charging Station manual can be found at [link to DSR125 PDF ─ placeholder]. These manuals provide comprehensive information to ensure optimal charger operation and battery maintenance. Download and save these resources for future reference.