Tie Dye Washing Instructions: A Comprehensive Guide (Updated 12/22/2025)
Maintaining vibrant tie-dye requires diligent washing! This guide provides a printable checklist for initial washes, ensuring colorfastness and preventing dye transfer.
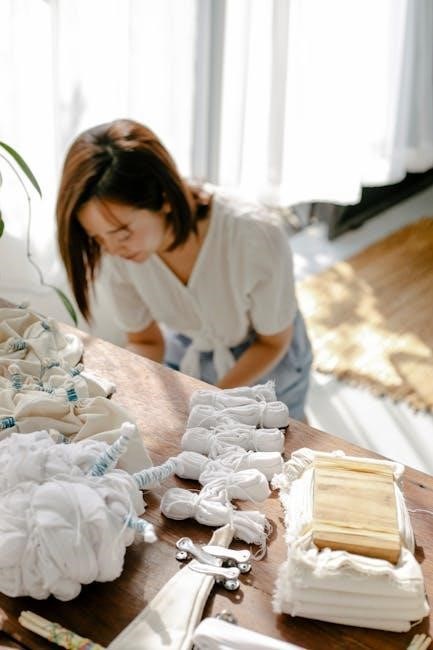
Follow these steps carefully to preserve your wearable art, keeping those brilliant hues looking fresh for years to come.
Remember: Separate washes are key, and gentle detergents are your friend!
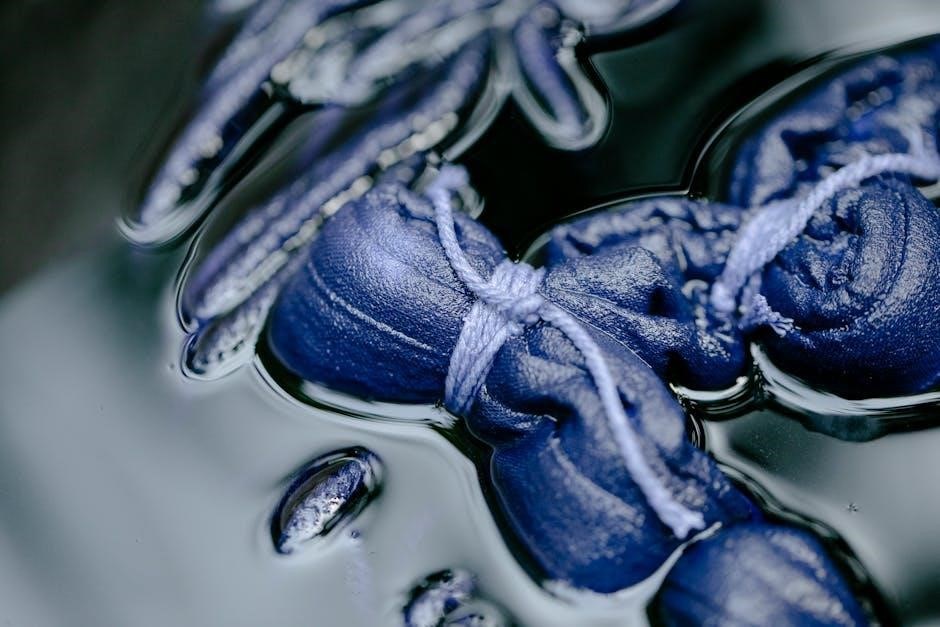
Understanding Dye Bleed & Colorfastness
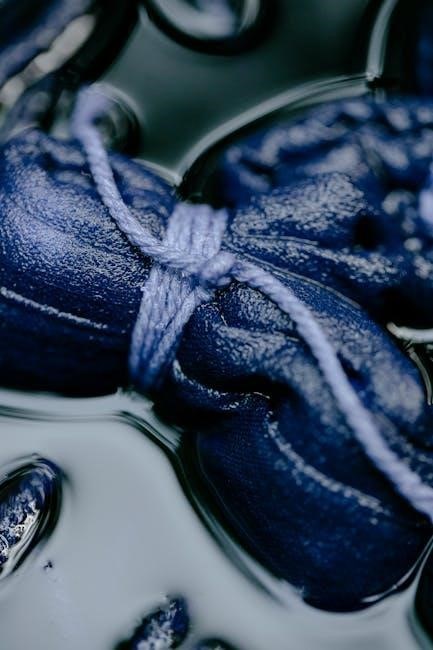
Dye bleed is the release of unbound dye molecules during washing, resulting in faded colors and potential staining of other fabrics. Colorfastness, conversely, refers to the dye’s resistance to bleeding and fading. Tie-dye projects, especially those made with reactive dyes, often experience initial dye bleed – this is perfectly normal!
The extent of dye bleed depends on several factors: the type of dye used, the fabric content, and the thoroughness of the rinsing process after dyeing. Reactive dyes form a chemical bond with the fabric, offering better colorfastness than direct dyes, but some initial bleeding is still expected. Cotton, linen, and rayon are more prone to dye bleed than synthetic fibers.
Understanding these concepts is crucial for establishing a proper washing routine. The first few washes are the most critical, as they remove excess, unbound dye. Failing to address dye bleed can lead to disappointing results – a washed-out, faded tie-dye, or worse, discoloration of other garments. Therefore, prioritizing separate washes and gentle detergents is paramount to maximizing color retention and preventing unwanted color transfer.
Think of it as a necessary “release” of excess dye, paving the way for a long-lasting, vibrant tie-dye creation!
Initial Wash – The Most Crucial Step
The very first wash is the most important step in securing the longevity and vibrancy of your tie-dye creation. This initial wash removes a significant amount of unbound dye, preventing it from transferring onto other clothes in subsequent washes. Treat this wash as a dedicated “dye release” cycle.
Use cold water exclusively – hot water encourages dye molecules to dissolve and spread. Employ a mild, pH-neutral detergent, avoiding those with bleach or brighteners. Wash the tie-dye item completely alone; do not include any other garments. A gentle cycle on your washing machine is recommended, minimizing agitation.
After the wash, do not tumble dry! Instead, hang the item to air dry, preferably in a shaded area. Inspect the wash water after the cycle; if it’s still heavily colored, repeat the initial wash. This process may need to be repeated 3-5 times, or until the water runs clear, indicating most of the excess dye has been removed. Patience during this stage is key to a successful outcome!
Skipping or rushing this step significantly increases the risk of color bleeding and fading.
Cold Water Wash: Why It Matters
Cold water is your ally when it comes to preserving the brilliance of your tie-dye projects. Unlike hot water, which opens fabric fibers and encourages dye molecules to release, cold water minimizes dye loss. Think of it as gently rinsing, rather than actively extracting, the color.
Hot water dramatically increases the likelihood of dye bleeding – that unwanted transfer of color onto other garments. Even after several initial washes, some residual dye may remain, and hot water will readily dissolve it. This is especially crucial for vibrant or deeply saturated tie-dye pieces.
Furthermore, cold water helps to prevent fading. The heat from hot water can break down the dye molecules over time, leading to a duller, less saturated appearance. Maintaining a cold water washing routine extends the life and vibrancy of your tie-dye creations.
Always check the care label, but for tie-dye, cold water is almost universally the best choice. It’s a simple step with a significant impact on the longevity and appearance of your colorful designs.
Detergent Selection: Gentle is Key
Choosing the right detergent is paramount to protecting your tie-dye’s vibrant colors. Harsh detergents containing enzymes, bleach, or brighteners can strip the dye from the fabric, leading to fading and a washed-out appearance. Opt for detergents specifically formulated for delicate fabrics or those labeled as “color-safe.”
Avoid detergents with optical brighteners; while they make whites appear whiter, they can actually diminish the intensity of colors in your tie-dye. These brighteners work by depositing substances onto the fabric, which can interfere with the dye molecules.
Liquid detergents are generally preferred over powdered detergents, as they dissolve more completely and are less likely to leave residue on your tie-dye. Residue can attract dirt and contribute to fading over time.
Consider detergents designed for dark colors, as these are typically formulated to be gentler and help preserve dye. Always use the minimum amount of detergent necessary for a thorough clean – more isn’t always better!
Look for pH-neutral formulas to further minimize dye loss and maintain fabric integrity.
Washing Alone: Preventing Color Transfer
The initial washes are critical – always wash your newly tie-dyed garments completely alone. Even seemingly colorfast fabrics can release excess dye during the first few washes, potentially staining other clothes. This is especially true for vibrant and deeply saturated tie-dye projects.
Resist the temptation to combine your tie-dye with even similar-colored items. Unexpected dye transfer can occur, leading to unwanted discoloration of your other clothes. Think of it as protecting both your tie-dye and your wardrobe!
Treat each initial wash as a solo mission for your tie-dye. This precaution minimizes the risk of color bleeding and ensures the longevity of both your tie-dye and your other garments.
Be patient! While it might be inconvenient, washing alone for the first 3-5 washes is a small price to pay for preserving the vibrancy and integrity of your tie-dye creation.
Consider it an investment in the life of your colorful masterpiece, safeguarding against accidental color mishaps and ensuring years of enjoyment.
Number of Initial Separate Washes (3-5 Recommended)
Why 3-5 washes? This range provides a balance between thorough dye removal and practicality. While some heavily dyed items might require more, 3-5 separate washes are generally sufficient to minimize the risk of significant color bleed. Each wash progressively releases more excess dye, gradually increasing colorfastness.
Observe after each wash! Don’t blindly stick to five washes if the water runs clear after three. Checking for dye release (detailed in a later section) is crucial. Adjust the number of washes based on your observations.
Consider the dye type – reactive dyes, commonly used in tie-dye, bond well with fabric but still require initial separation. Direct dyes are less colorfast and may necessitate more washes.
Err on the side of caution – it’s better to wash alone one extra time than to ruin a load of laundry. Patience during this initial phase pays dividends in the long run.
This isn’t a rigid rule, but a guideline. The goal is to achieve minimal dye release before combining your tie-dye with other clothes.
Checking for Excess Dye After Each Wash
The “White Cloth Test” is your best friend! After each initial wash, before drying, take a clean, white cloth (an old washcloth works perfectly). Submerge it in the wash water and gently agitate it.
Observe the cloth carefully. If any dye transfers to the white cloth, it indicates that your tie-dye item is still releasing excess color. Repeat the washing process – another separate wash is necessary.
Pay attention to the water’s color. Even if the cloth doesn’t show obvious staining, a noticeably colored wash water suggests continued dye release. Don’t risk color transfer to other garments!
Focus on the most vibrant areas. Check the cloth after agitating it with water from areas of the tie-dye that are particularly brightly colored, as these tend to release more dye.
Continue testing until the water remains clear. This confirms that the majority of excess dye has been removed, and your tie-dye is ready for the next stage of washing.
When Can You Wash Tie Dye with Other Clothes?
Patience is key! Resist the urge to combine your tie-dye with other laundry until you’ve confidently passed the “White Cloth Test” for 3-5 consecutive washes – or until absolutely no dye is released;
Consider the dye’s intensity. Brighter, more saturated tie-dye projects generally require more washes before they’re fully colorfast. Darker dyes, like navy or black, are notorious for bleeding.
Start cautiously. When you’re ready to transition, begin by washing your tie-dye with items of similar colors. Think other tie-dye pieces, or clothing in shades of white or light grey.
Avoid mixing with light colors initially. Steer clear of washing your tie-dye with pristine whites or pastels until you’re absolutely certain the dye won’t transfer. It’s better to be safe than sorry!

Always check for dye release, even after combining. Continue to monitor for any color transfer during the first few washes with other clothes, just to be extra cautious.
Washing with Similar Colors: A Safe Transition
Gradual integration is best! Once your tie-dye has undergone several solo washes and shows minimal dye release, introducing similar colors is a smart next step. This minimizes the risk of unwanted color transfer and protects your other garments.
What constitutes “similar”? Think shades within the same family – blues with other blues, reds with reds, and so on. Grey and white can sometimes work, but monitor closely for any faint tinting.
Avoid strong contrasts initially. Don’t immediately pair your vibrant tie-dye with a brand-new, bright white shirt. The risk of dye bleeding is still present, even if reduced.
Consider fabric type. Natural fibers like cotton are more prone to accepting dye than synthetics. Wash tie-dye with similar fabric types for best results.
Continue using cold water and gentle detergent. Even when washing with similar colors, maintain the same careful washing practices you used during the initial solo washes. This helps preserve both the tie-dye and the other items.
Always check for lingering dye. After the wash, inspect both the tie-dye and the other clothes for any signs of color transfer. If you see any, revert to solo washes.
Avoiding Hot Water: Preserving Vibrancy
Hot water is the enemy of vibrant tie-dye! High temperatures dramatically increase dye release, leading to faded colors and potential staining of other clothes. Always opt for cold water – it’s the single most important factor in maintaining the brilliance of your tie-dye creations.
Why cold water works: Cold water constricts the fabric fibers, preventing the dye molecules from escaping as easily. Hot water, conversely, opens the fibers, allowing the dye to flow freely.
Even lukewarm water is risky. Stick to genuinely cold water throughout the entire washing process, from the initial rinse to the final spin cycle.
Check your washing machine settings. Ensure your machine is set to a cold water wash cycle. Many machines have preset options for delicate fabrics, which often default to cold water.
Consider hand washing for extra caution. If you’re particularly concerned about color fading, hand washing in cold water offers the most control and gentlest treatment.
This applies to rinsing too! A cold water rinse is just as crucial as a cold water wash. Don’t compromise on temperature at any stage.
Protect your investment! Cold water is a simple step with a huge impact on the longevity and vibrancy of your tie-dye.
Drying Methods: Air Drying vs. Machine Drying
Choosing the right drying method is crucial for preserving your tie-dye’s vibrancy. While machine drying offers convenience, it poses risks to colorfastness. Air drying is overwhelmingly the preferred method for maintaining bright, bold hues.
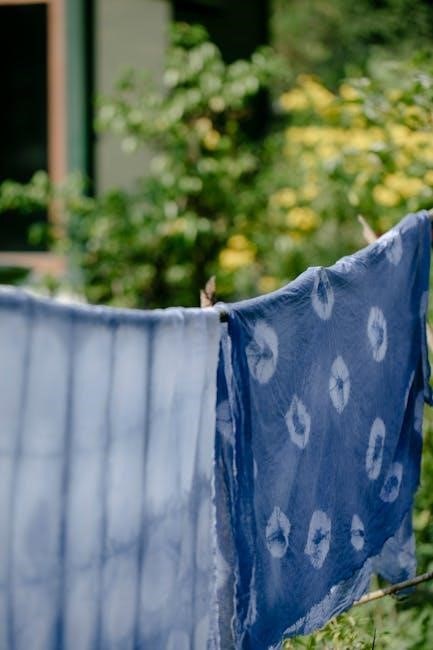
Air drying’s gentle approach: Air drying avoids the heat that can cause dye molecules to break down and fade. It’s a slower process, but the results are worth it. Hang your tie-dye item on a clothesline or lay it flat on a clean, dry surface, away from direct sunlight.
Machine drying – proceed with caution! If you must use a machine dryer, select the lowest heat setting possible. High heat is a guaranteed way to accelerate fading and potential shrinkage.
Consider a delicate cycle. A delicate or gentle cycle will minimize agitation and heat exposure. Remove the item promptly once the cycle is complete to prevent over-drying.
Inside-out drying is recommended. Turning your tie-dye garment inside out protects the design from abrasion and direct heat exposure.
Avoid dryer sheets. Dryer sheets can leave residue on the fabric and potentially affect the dye.
Prioritize longevity! Air drying is the safest bet, but low-heat machine drying can be acceptable with careful monitoring.
Air Drying: The Preferred Method
Air drying stands as the gold standard for preserving the brilliance of your tie-dye creations. It’s a gentle, low-impact process that minimizes dye fading and maintains fabric integrity. Unlike machine drying, air drying avoids harsh heat exposure, a primary culprit in color degradation.
Optimal air drying techniques: The ideal scenario involves hanging your tie-dye item on a clean clothesline, preferably in a shaded area. Direct sunlight can, ironically, contribute to fading over time. If a clothesline isn’t available, lay the garment flat on a clean, dry towel or surface.
Avoid direct sunlight: Prolonged exposure to the sun’s UV rays can break down dye molecules, leading to noticeable fading. Shade is your friend!
Ensure proper ventilation: Good airflow promotes faster drying and prevents mildew growth.
Turn inside out: Drying the garment inside out further protects the vibrant design from external elements and potential abrasion.
Patience is key: Air drying takes longer than machine drying, but the superior results are well worth the wait. Embrace the slower pace and enjoy the peace of mind knowing you’re treating your tie-dye with the utmost care.
Long-lasting vibrancy!
Machine Drying: Low Heat Only
While air drying is preferred, machine drying is acceptable only under very specific conditions. High heat is the enemy of tie-dye, causing significant fading and potential damage to the fabric. If you must use a dryer, adhere strictly to the “low heat” setting – and even then, proceed with caution.
Low heat is crucial: The lower the temperature, the less stress on the dye molecules. Avoid any setting labeled “medium” or “high” at all costs. These settings will accelerate fading and can even cause the dye to bleed.
Shorten drying time: Check the garment frequently during the drying cycle. Remove it as soon as it’s dry to minimize heat exposure. Over-drying is a common mistake that leads to unnecessary fading.
Inside-out drying: Always dry tie-dye items inside out. This shields the vibrant design from direct heat and abrasion within the dryer drum.
Consider a delicate cycle: If your machine has a delicate or gentle cycle, utilize it for added protection. This cycle typically uses lower heat and a slower tumbling action.
Use with caution: Even with these precautions, machine drying carries a higher risk of fading compared to air drying. Prioritize air drying whenever possible to preserve the longevity and vibrancy of your tie-dye.
Protect your investment!
Inside-Out Washing & Drying: Protecting the Design
Turning your tie-dye garments inside out before both washing and drying is a simple yet incredibly effective step in preserving the vibrancy of the colors and the integrity of the design. This practice minimizes friction and direct exposure to abrasive elements during the cleaning process.
Washing inside out: When washed normally, the surface of the tie-dye experiences significant rubbing against other fabrics and the washing machine drum. This friction can cause the dye to fade and the design to wear down over time. Turning the garment inside out creates a protective barrier.
Drying inside out: The same principle applies to drying. Exposure to heat (even on low settings) and tumbling action can diminish the colors. Inside-out drying shields the design from these damaging effects.
Reduced fading: By reducing friction and direct exposure, inside-out washing and drying significantly slow down the fading process, keeping your tie-dye looking brighter for longer.
Preserve detail: This method also helps to preserve the intricate details of the tie-dye pattern, preventing them from becoming blurred or distorted.
A small effort, big reward: It’s a minor adjustment to your laundry routine that yields substantial benefits in the long run; Make it a habit!
Protect your colorful creations!
Using Color Catchers: An Extra Layer of Protection
Even after multiple separate washes, a small amount of dye release is common with tie-dye, especially during the initial stages. Color catchers provide an invaluable extra layer of protection against unwanted color transfer, offering peace of mind during the laundry process.
How they work: These sheets, or balls, are designed to attract and trap loose dyes in the wash water, preventing them from redepositing onto other garments. They’re particularly useful when you’re transitioning from washing tie-dye alone to washing it with similar colors.
Simple to use: Simply toss one or two color catcher sheets into the washing machine along with your tie-dye item. Follow the package instructions for the appropriate number of sheets based on the load size and the intensity of the colors.
Visual confirmation: After the wash cycle, check the color catcher sheet. If it has absorbed dye, it indicates that some dye was still being released. Continue using color catchers until the sheets come out clean.
Added security: They’re a cost-effective way to safeguard your other clothes and ensure that your tie-dye remains vibrant without accidentally dyeing other items.
A smart precaution: Consider color catchers a valuable investment in preserving the beauty of your tie-dye creations and protecting your wardrobe!
Don’t risk color bleed!
Best Detergents for Tie Dye (Gentle Formulas)
Choosing the right detergent is crucial for preserving the vibrancy and longevity of your tie-dye creations. Harsh detergents containing enzymes, bleach, or brighteners can strip the dye and cause fading, so opting for gentle formulas is essential, especially during the initial washes.
Look for detergents specifically designed for delicate fabrics or colors. These typically have a neutral pH and lack harsh chemicals that can damage the dye molecules. Avoid detergents with added fragrances or dyes, as these can also contribute to fading or color bleeding.
Recommended options: Many people recommend detergents like Woolite, Dreft, or those labeled for “sensitive skin.” These are generally mild and effective at cleaning without being overly aggressive.
Liquid detergents are often preferred over powder detergents because they dissolve more easily and are less likely to leave residue on the fabric. However, if using a powder detergent, ensure it’s fully dissolved before adding your tie-dye item.
Less is more: Use only the recommended amount of detergent, as excessive suds can hinder the rinsing process and potentially trap dye in the fabric.
Protect your investment: Selecting a gentle detergent is a simple yet effective step in ensuring your tie-dye remains bright and beautiful for years to come!
Gentle cleaning equals lasting color!
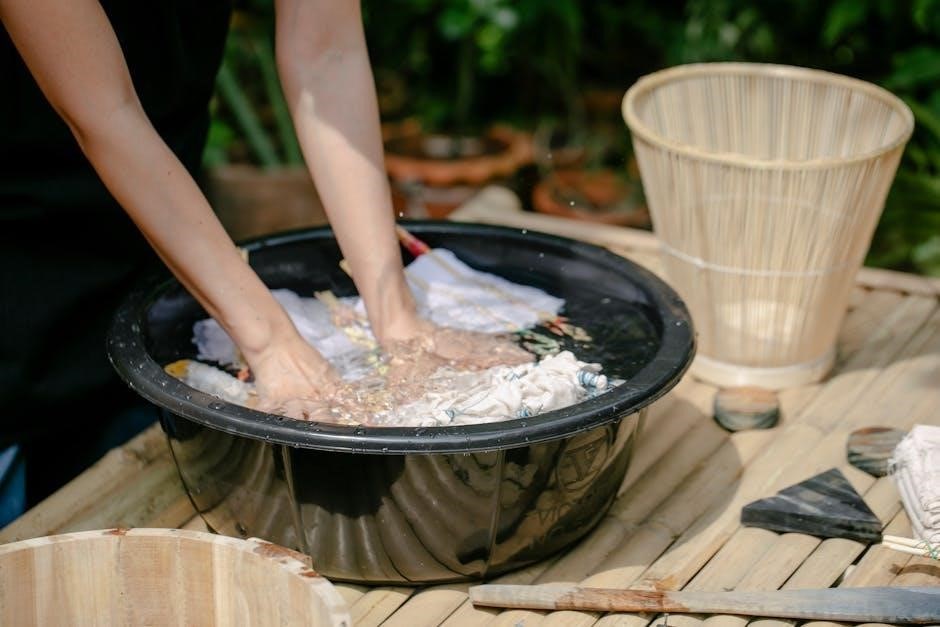
Hand Washing Tie Dye: A Delicate Approach
For particularly vibrant or delicate tie-dye pieces, hand washing offers the gentlest cleaning method. This approach minimizes agitation and reduces the risk of color bleeding, preserving the intricate designs and brilliant hues. It’s ideal for the first few washes, or for items you cherish most.

Fill a clean basin or sink with cool water and add a small amount of gentle detergent – the same kind you’d use for machine washing tie-dye. Submerge the garment and gently swirl it around, avoiding harsh scrubbing or twisting.
Allow the item to soak for 15-30 minutes, then rinse thoroughly under cool, running water until all traces of detergent are gone. Continue rinsing until the water runs clear.

Avoid wringing the garment, as this can distort the fabric and damage the design. Instead, gently squeeze out excess water or roll it in a clean towel to absorb moisture.
Lay the item flat to dry on a clean, dry surface, away from direct sunlight or heat. This will help prevent fading and maintain the shape of the tie-dye.
Hand washing is a labor of love, ensuring your tie-dye receives the utmost care and remains a vibrant expression of your creativity!
Delicate care for lasting art!
Dealing with Faded Colors: Reviving Your Tie Dye
Even with careful washing, tie-dye colors can fade over time. Don’t despair! Several methods can help revive your vibrant creations and restore some of their original brilliance. Understanding the cause of fading – often due to sun exposure or harsh detergents – is the first step.
For mildly faded colors, a soak in a solution of cool water and white vinegar (1/2 cup vinegar per gallon of water) can help re-set the dye. Allow the garment to soak for 30 minutes, then rinse thoroughly and air dry.
Another option is to use a color-reviving laundry booster specifically designed for bright colors. Follow the product instructions carefully, and always test on an inconspicuous area first.
Avoid using bleach or harsh chemicals, as these will only accelerate the fading process. Gentle care is key to preserving the remaining color.
Consider re-dyeing the garment if the fading is significant. This is a more involved process, but it can completely restore the original vibrancy.
Preventative measures, like washing inside-out and avoiding direct sunlight, are the best way to maintain color longevity.
Revive, restore, and enjoy!
Long-Term Care: Maintaining Brightness
Preserving the vibrancy of your tie-dye creations extends beyond the initial washes. Consistent, mindful care is crucial for long-term color retention and preventing premature fading. Think of your tie-dye as a cherished piece of art – it deserves gentle handling!
Continue washing tie-dye items inside-out, even after they’ve been thoroughly rinsed of excess dye. This minimizes friction and protects the design from abrasion during the wash cycle.
Always opt for cold water washes and gentle detergents. Harsh chemicals and high temperatures are the enemies of bright colors. Consider detergents specifically formulated for delicate fabrics or bright colors.

Avoid prolonged exposure to direct sunlight when drying. Air drying is always preferable, but if using a machine, select the lowest heat setting.
When storing tie-dye garments, keep them out of direct sunlight and away from heat sources. Folding them neatly or hanging them on padded hangers will help prevent wrinkles and maintain their shape.
Regularly check for any signs of fading and address them promptly using the revival techniques mentioned previously.
Consistent care equals lasting color!
Printable Washing Instructions Checklist
Downloadable Tie-Dye Washing Guide – Keep this handy! To ensure your vibrant creations stay brilliant, print this checklist and keep it near your laundry area. Following these steps will minimize dye bleed and maximize the lifespan of your tie-dye’s colors.
☐ Initial Wash (Separate): Wash item alone in cold water with a gentle detergent.
☐ Repeat Washes (3-5): Continue washing separately until water runs clear.
☐ Check for Dye: Inspect water after each wash for excess dye.
☐ Cold Water Only: Always wash in cold water, even after initial washes.
☐ Gentle Detergent: Use a mild detergent formulated for colors.
☐ Wash Inside-Out: Protect the design by washing garments inside out.
☐ Air Dry Preferred: Air drying preserves colors best; avoid direct sunlight.
☐ Low Heat (Machine Dry): If machine drying, use the lowest heat setting.
☐ Color Catchers: Consider using color catcher sheets for added protection.
Pro Tip: Laminate this checklist for durability and easy cleaning! A little preventative care goes a long way in maintaining the beauty of your tie-dye.